This tutorial will walk you through using the Cricut (also available at the main library with help from our tech trainers) creating a design that can be applied on a t-shirt. You will learn about some of the tools available in Cricut Design Space and how to apply your cut to the fabric. Watch the video for more information.
For this project you will need:
- A Cricut cutting machine
- A Standard grip Cricut cutting mat
- Heat Transfer Vinyl (I used white, pink, black and green, but you can use whatever colors you choose)
- A weeding hook
- A blank T-shirt
- A heat press (You can also use a household iron, here is a link to a YouTube tutorial!)
- An ironing board or mat
Optional: 1 piece of Teflon or parchment paper
The first step is to download Cricut Design Space to your computer. There is no longer a browser version of this software. You will find the link to download here. You will also need to create a login, which is free.
A created a video is also included showing how Robin, out tech trainer, made this Cricut project in Design Space, which you can find here: [Insert Video Link]. To get started without the video, just follow this link to the project I created, and choose, “Make it!”
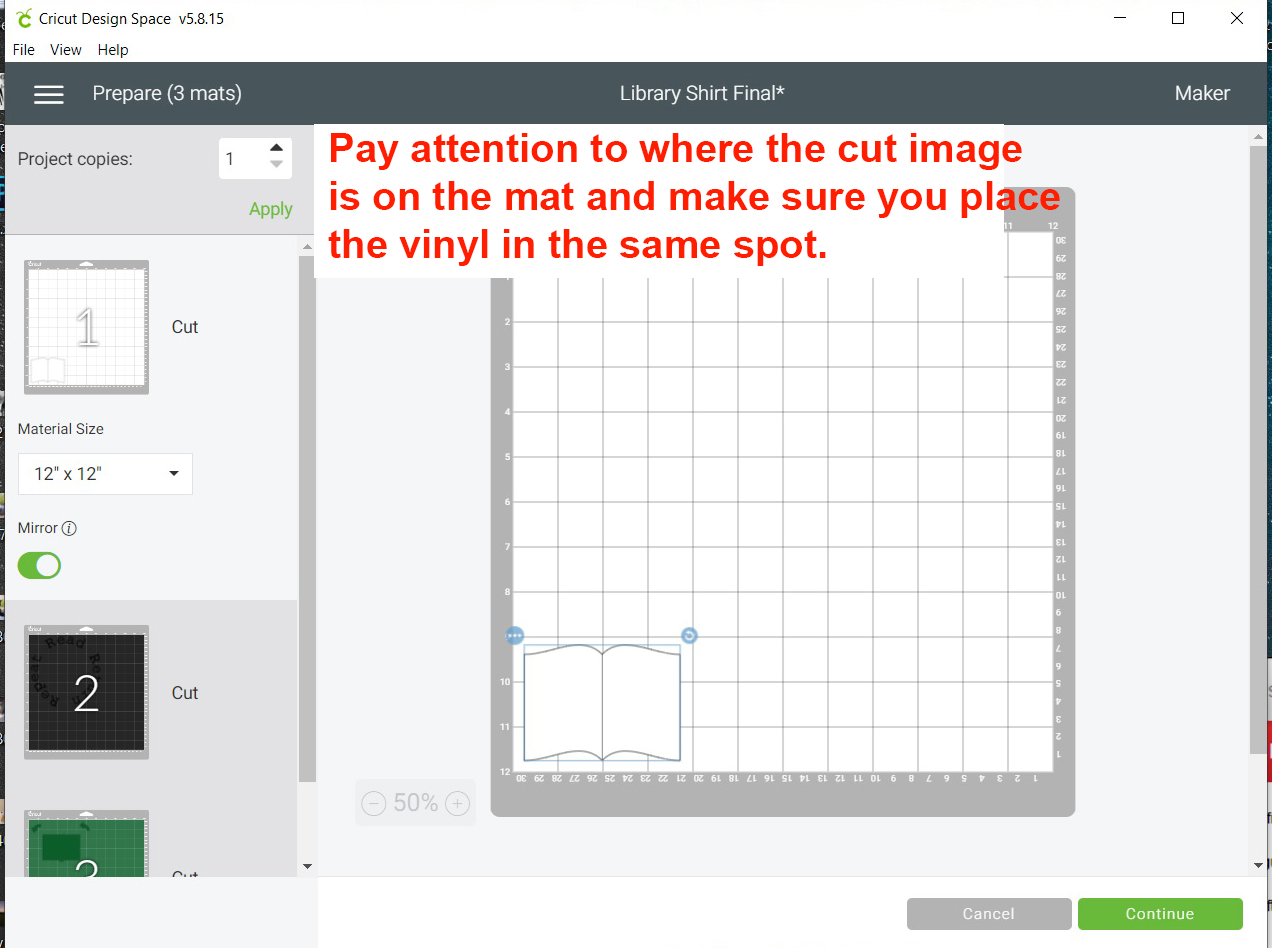
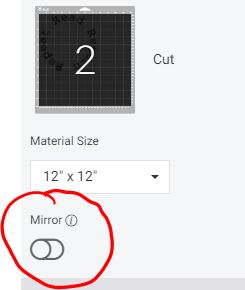
- Once you are on the print screen, make sure you MIRROR the words and arrows of the design before you start to cut. The option to mirror is on the left side of the screen underneath the thumbnail of your grid.
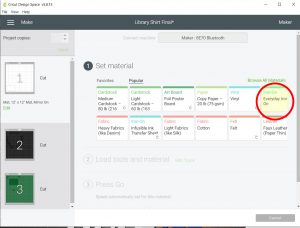
- Make sure your Cricut is connected. A prompt will open asking what material you are cutting. Choose “Everyday iron on.” Note: if you are using a Cricut Explore or a machine with a dial, you may have to select your material using the dial on the right-hand side of the machine.
- Choose the color vinyl you want to use. Cut it with scissors to a size that is slightly larger than your image size. For the lettering, I cut an 8” x 8” square.
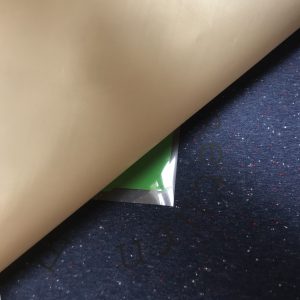
- Get out your standard grip mat and place the vinyl in the area where the machine will cut it. For heat transfer vinyl, lay it shiny-side-down
.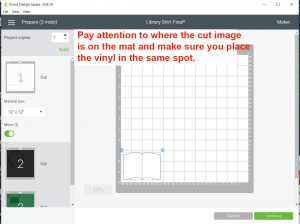
- Load the mat into your Cricut by pressing the load button. It will start to flash once the Cricut is ready. When your vinyl is loaded, you may then press the cut button. Your screen will prompt you when to do so.
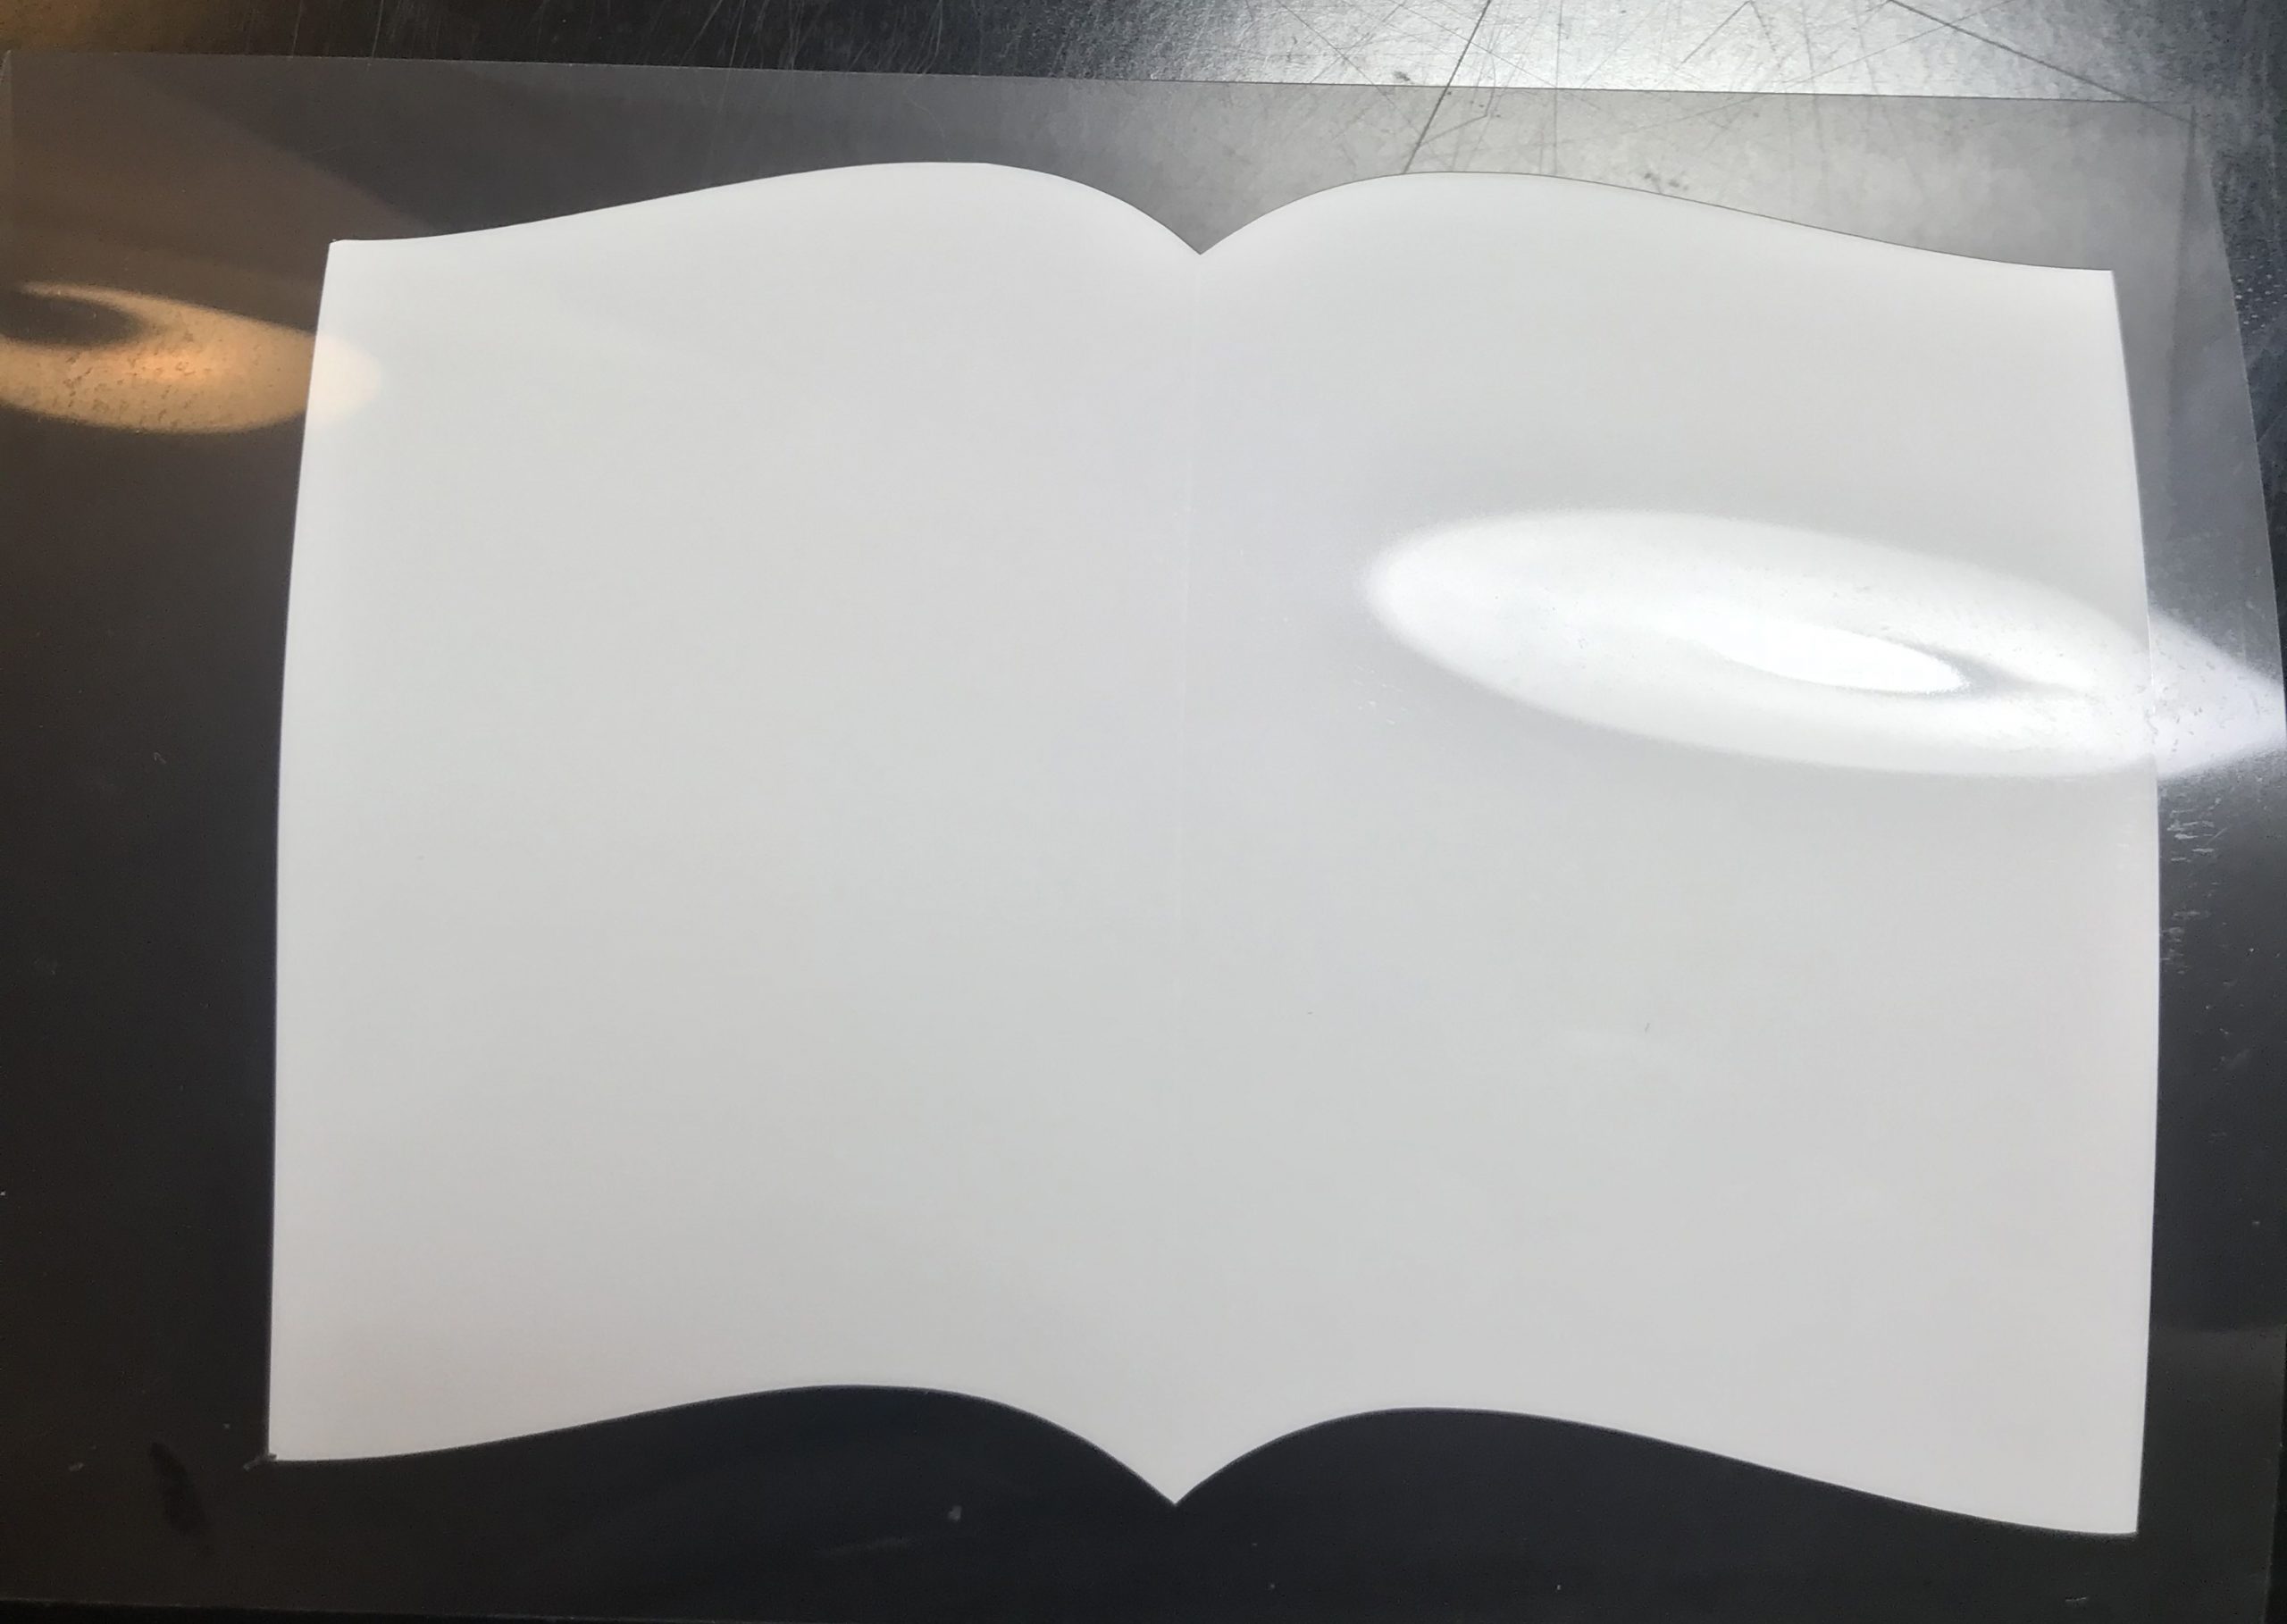
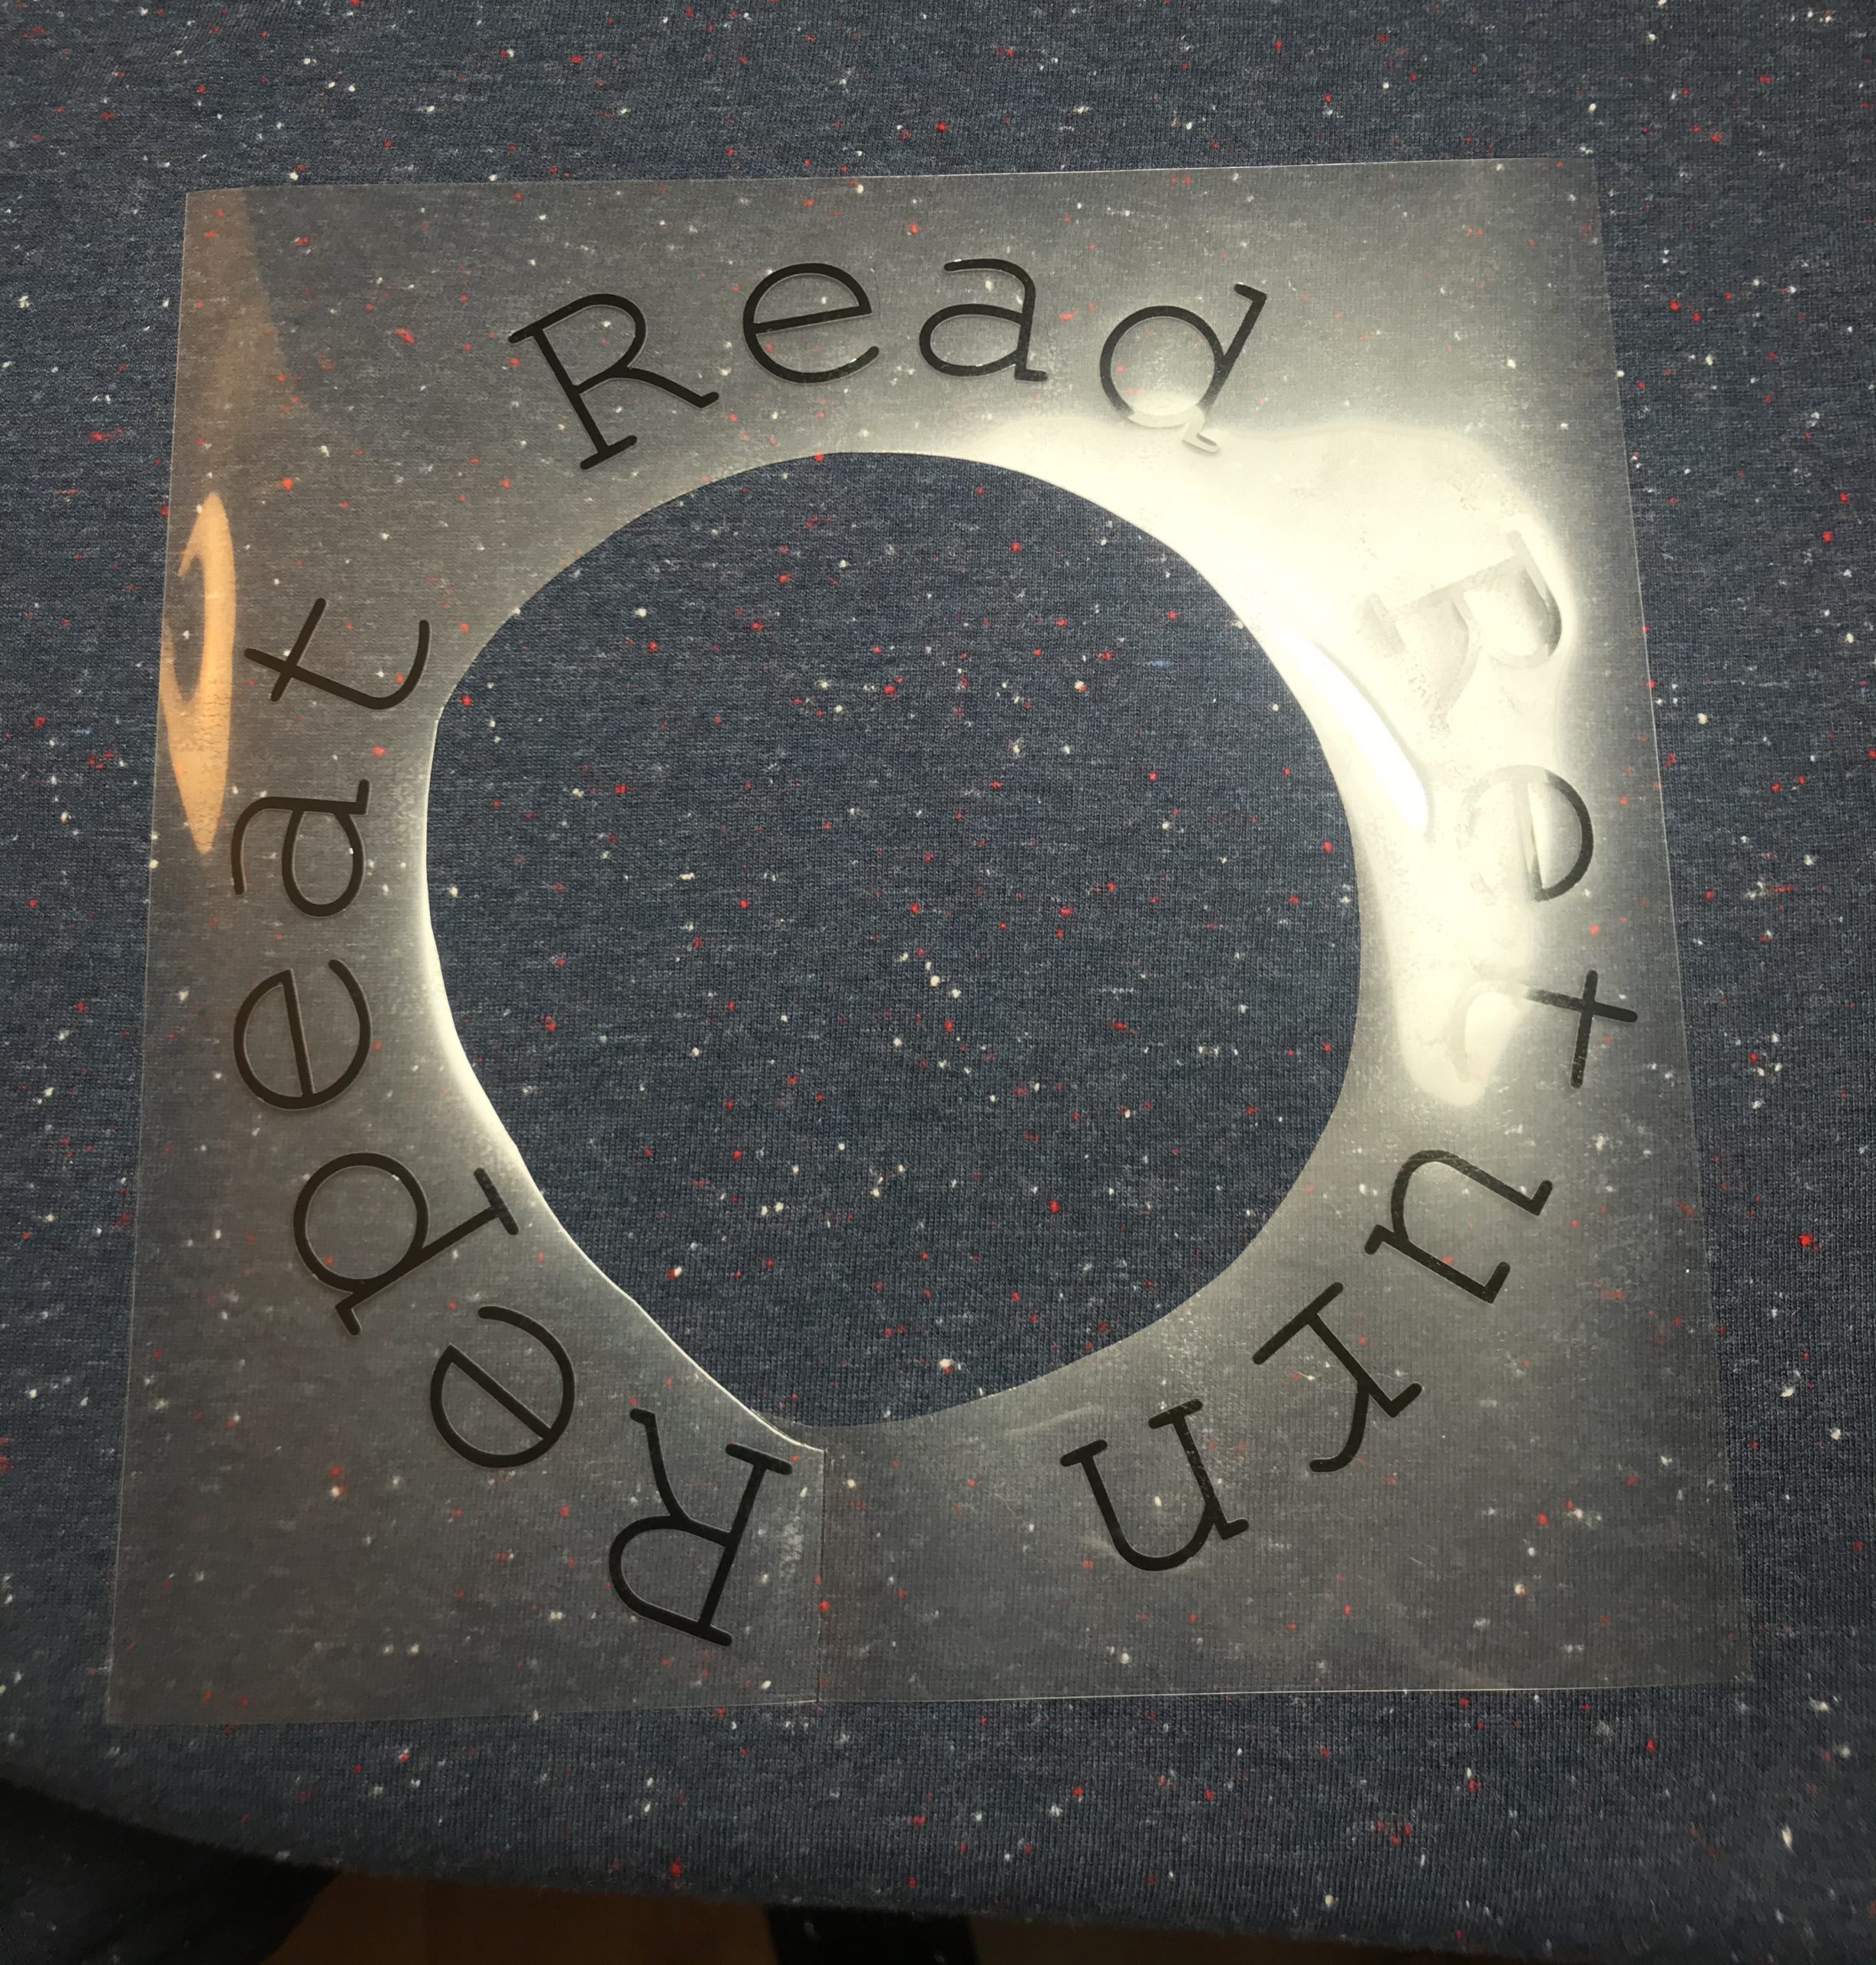
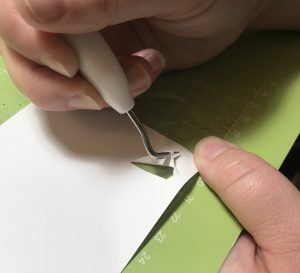
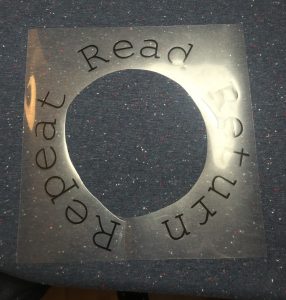
- Once your vinyl is cut, grab your weeding hook and pull out all the parts you do not want on the shirt.

- Repeat steps 3-6 for each part of the design.
- After all parts of the design are cut and weeded, it’s time to get out the shirt, ironing board, heat press, and Teflon (or parchment paper).
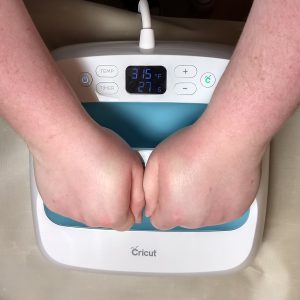
- Set your heat press for 315 degrees for 30 seconds. If you are using an iron, put it on the linen setting.
- Lay your shirt out and prep the area where you will apply the vinyl by setting the heated press on it for a few seconds.
- Lay the vinyl in the place you want it to stick. Hold the press firmly over the vinyl for 30 seconds.
- Once you remove the heat-press, let the vinyl cool before you peel off the plastic backing. Lay down the next piece of vinyl you want to iron on.
- This is where you will use a sheet of Teflon or parchment paper. After you place the next piece of your design on the shirt, lay down the sheet. Then, repeat the steps with the heat press or iron.
- Repeat these steps until each part of your design has been ironed on! By the end, it should look something like this.

- DO NOT wash the shirt for 48 hours. After that, wash it inside-out the first three washes and air dry to ensure the vinyl doesn’t stretch or fall apart.